
How to Install LiteSpeed Web Server: A Step-by-Step Guide for Beginners
Discover how to supercharge your website's speed and security by migrating to LiteSpeed Web Server. This comprehensive, step-by-step guide walks you through server preparation, installation, Apache integration, and performance verification to help you optimize your hosting environment effortlessly.
In today's fast-paced digital landscape, website speed is no longer just a luxury—it is a fundamental necessity. Users abandon slow-loading pages within seconds, and search engines like Google heavily penalize sluggish performance. While traditional web servers like Apache and Nginx have long dominated the market, LiteSpeed Web Server (LSWS) has emerged as a powerhouse for performance optimization, offering unmatched speed, security, and seamless compatibility with Apache.
If you are looking to supercharge your hosting environment, migrating to LiteSpeed is one of the best decisions you can make. In this comprehensive guide, we will walk you through the step-by-step process of installing LiteSpeed Web Server, ensuring your websites load at lightning speed.
Understanding LiteSpeed and Prerequisites
Before diving into the installation process, it is important to understand what makes LiteSpeed unique and what you need to get started. LiteSpeed is a proprietary web server that is drop-in compatible with Apache. This means it can read your existing Apache configuration files, support your .htaccess rules, and work seamlessly with popular control panels like cPanel, DirectAdmin, and CyberPanel, all without requiring you to rewrite your stack.
To ensure a smooth installation process, make sure you have the following prerequisites in place:
- A Compatible Operating System: LiteSpeed supports most major Linux distributions, including AlmaLinux, Rocky Linux, CloudLinux, CentOS, and Ubuntu.
- Root Access: You will need root-level SSH access to your server to execute the installation scripts.
- A Valid License: While LiteSpeed offers a Free Starter Edition with limitations, you will need a trial or paid license key for full production features, such as LSCache support and unlimited domains.
- An Existing Web Stack: Typically, LiteSpeed is installed alongside or as a replacement for Apache, often paired with MySQL/MariaDB and PHP.
"Migrating to LiteSpeed can immediately reduce your server's resource consumption while drastically improving page load times, especially for heavy WordPress sites."
Step 1: Preparing Your Server Environment
Before installing the actual LiteSpeed binary, you need to prepare your server. This involves updating your existing system packages and obtaining your LiteSpeed license key.
First, log into your server via SSH as the root user and update your package lists to ensure everything is current:
- For AlmaLinux, Rocky Linux, or RHEL-based systems:
sudo yum update -y - For Ubuntu or Debian-based systems:
sudo apt update && sudo apt upgrade -y
Next, if you plan to use a trial or commercial license, make sure your trial license key or serial number is ready. You can obtain a free 15-day trial license directly from the LiteSpeed Technologies website if you want to test the waters before purchasing.
Step 2: Downloading and Installing LiteSpeed Web Server
Once your server environment is prepped, you are ready to download and run the automated LiteSpeed installation script. LiteSpeed provides a straightforward installation script that handles most of the heavy lifting.
Follow these steps to complete the installation:
- Navigate to a temporary directory on your server:
cd /usr/src - Download the official LiteSpeed installation tarball:
wget https://www.litespeedtech.com/packages/lsws/litespeed-5.4.12-app.tgz(Note: Check the LiteSpeed website for the absolute latest stable version.) - Extract the downloaded archive:
tar -zxvf litespeed-*.tgz - Move into the newly created directory:
cd lsws - Run the installation script:
./install.sh
During the installation process, the script will prompt you to accept the End User License Agreement (EULA), specify your target installation path (typically /usr/lsws), and set up your administrative credentials. Make sure to choose a strong username and password for the LiteSpeed WebAdmin Console, and provide a valid administrator email address for critical notifications.
Step 3: Configuring WebAdmin and Integrating with Apache
After the installation script finishes successfully, you need to configure your server settings and ensure it communicates correctly with your existing setup. LiteSpeed features a powerful web-based administration console known as WebAdmin.
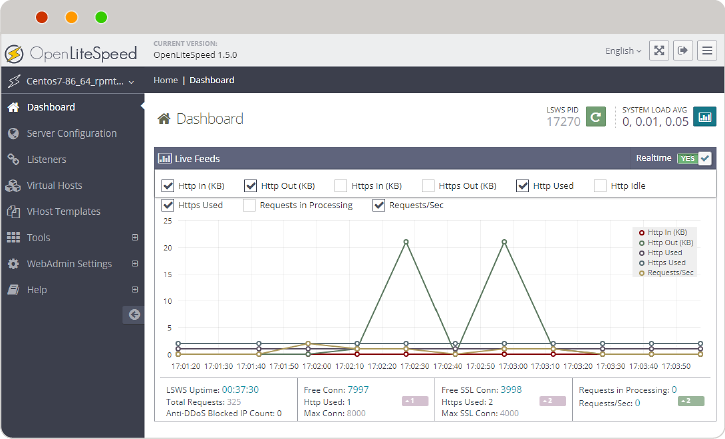
You can access the WebAdmin console by navigating your web browser to your server's IP address followed by port 7080 (e.g., https://your-server-ip:7080). Note that your browser may display a security warning because of the self-signed SSL certificate; you can safely bypass this to proceed.
Key configuration steps include:
- Setting up Listeners: Configure your HTTP and HTTPS listeners so the server knows which ports to monitor for incoming traffic (usually ports 80 and 443).
- External App Configuration: If you are running PHP, ensure your PHP versions (LSAPI) are properly mapped so your dynamic content executes correctly.
- Apache Replacement: If you are using a control panel like cPanel, utilize the specific plugin provided by LiteSpeed to switch from Apache to LiteSpeed seamlessly with a single click.
Step 4: Verifying the Installation and Testing Performance
The final step is to verify that LiteSpeed is running properly and actively serving your websites. You can check the service status via your command line using the following command:
/usr/lsws/bin/lswsctrl status
If the server is running, open your web browser and visit your domain. You can also inspect the HTTP headers using browser developer tools or online testing utilities to confirm that the server signature reads LiteSpeed instead of Apache or Nginx.
To truly unlock the power of LiteSpeed, don't forget to install the LiteSpeed Cache (LSCache) plugin if you are running a CMS like WordPress, Magento, or Joomla. LSCache integrates tightly at the server level to provide page caching that far outperforms traditional plugin-only caching solutions.
Conclusion
Installing LiteSpeed Web Server is one of the most impactful upgrades you can make to your web hosting infrastructure. By following this guide, you have successfully deployed a high-performance, secure, and scalable web server capable of handling massive traffic spikes while reducing CPU and memory overhead.
Whether you manage a personal blog, a bustling e-commerce store, or enterprise-level client websites, the speed and reliability offered by LiteSpeed will elevate your user experience and SEO rankings to new heights. Take the time to explore the WebAdmin console, fine-tune your caching rules, and enjoy the blazing-fast performance of your newly optimized server!
More in Web Panel
Domain Name Theft & Hijacking: 5 Essential Steps to Protect Your Registrar Account
In today's hyper‑connected world, a domain name is a vital asset that cybercriminals constantly target, making robust protection essential. By choosing a reputable registrar, hardening credentials, enabling domain‑level safeguards, monitoring activity, and training staff, you can keep your digital real‑estate secure and maintain full control over your online presence.
“Seamless Integration: How to Embed JetBackup 5 Client Portals Directly into Your WHMCS Client Area”
Embedding JetBackup 5’s self‑service portal directly into the WHMCS client area gives hosting providers a friction‑free, branded backup experience that cuts support tickets and opens upsell opportunities. This guide walks you through installing the official JetBackup addon, crafting a custom WHMCS template with an iframe, and using a secure WHMCS hook to generate time‑limited portal URLs—all while keeping security tight and the integration future‑proof.
Mastering CloudLinux Node Rebalancing: A Step‑by‑Step Guide for Multi‑WHM Bare Metal Environments
Managing a fleet of WHM/cPanel servers with CloudLinux can feel like juggling flaming torches, but automated node rebalancing turns that chaos into a well‑orchestrated performance symphony. By evenly redistributing LVE cages across bare‑metal nodes, you maximize hardware ROI, maintain consistent CPU and memory allocation, and free your team from tedious manual migrations.